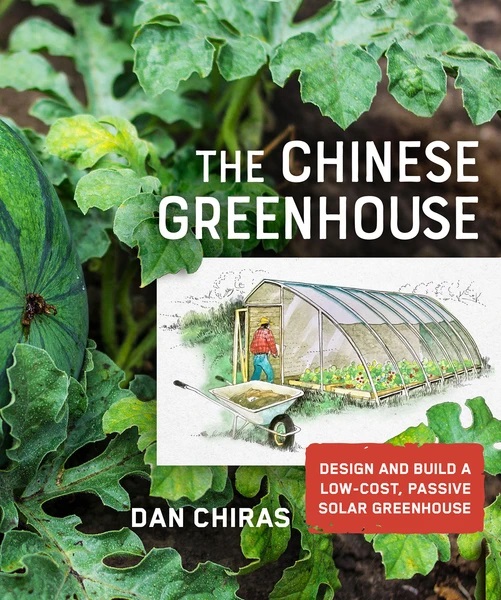
Book Review: The Chinese Greenhouse: Design and Build a Low-Cost, Passive Solar Greenhouse, Dan Chiras, New Society Publishers, 2021. 230 pages, color photos and diagrams throughout, $34.99.
I have been eagerly awaiting this book, after attending several of Dan Chiras’ workshops where he talked about the evolution of Chinese Greenhouses. This is a next step for those of us thrilled with what we can grow in a passive solar hoophouse. As we harvest our abundant winter greens, we might ponder “What if it were possible to grow warm weather crops in winter without fossil fuels, given a careful greenhouse design with attention to insulation and so on?†The Chinese Greenhouse provides the answers, design and construction tips for pioneers in this new kind of greenhouse. Don’t reinvent the wheel – get this book and learn from those who have gone before.
Chinese Greenhouses are not readily available off the shelf, and are best designed to suit the particular site. This book tells you, step-by-step, how to build your own. Naturally, building one of these high-performing structures is more work than putting up a standard hoophouse (high tunnel), but once you have put up one of those, you might be ready for more challenge (and rewards).
Chinese greenhouses are solar-heated, earth-sheltered, well-insulated, plastic-glazed structures, using heat-banking, and shaded and curtained when appropriate. They are always oriented with a long side facing the sun. In the winter, this allows maximum (low-angle) sun exposure. In the summer, the high arc of the midday sun goes over the roof, and crops don’t get baked. The energy-intelligent design reduces your carbon footprint and saves you from future fuel bills, or imported vegetables.
Dan identifies six design problems with standard greenhouses that are solved with Chinese greenhouses. If you have a standard greenhouse, you can modify it to reduce the impact of the short-comings, by adding water for heat storage, using compost as a heat source, or storing pumped hot air in pipes in the soil. Dan Chiras has tried some of those. Also see The Bio-Integrated Farm by Shawn Jadrnicek. Or you can keep your existing hoophouse for growing winter greens, and put up a Chinese greenhouse for winter tomatoes and citrus trees.
Enclosing the north (south in southern hemisphere) side in the ground (which is 50-55°F (10-13°C) below the frost line year-round) is an important feature of these Chinese greenhouses, helping stabilize the temperature. To grow warm weather crops you need to maintain a greenhouse minimum temperature of 40-50°F (4-10°C). These crops may survive lower temperatures, but they will not thrive or be productive.
Dan Chiras met Dr Sanjun Gu, a world authority on Chinese Greenhouses, in Iowa in 2014, and gathered the available information (it wasn’t much, most was in Dr Gu’s slides!). Chinese greenhouses emerged in the mid-1980s, as a way to feed the expanding population. There have been three generations of such greenhouses, and traditional materials such as bamboo posts and external straw mat night curtains have now been replaced by easier-to-use modern materials. The first generation Chinese greenhouses had a bowed roof framing of bamboo poles in a mesh of tensioned steel wires. This framing was supported by many posts, and plastic sheeting was stretched over the top. At night, straw matting was unrolled on top of the roof (effective but labor-intensive). The second generation design reduced the number of posts supporting the roof, allowing the use of small machinery to till the soil. Third generation Chinese greenhouses don’t need posts at all, but have curved steel roof trusses (bows).
Newer models have replaced the straw matting on the outside with synthetic insulated blankets, or with reflective curtains on the inside of the roof, and replaced the hours of manual adjustments with mechanization. There are now billions of acres of these greenhouses in China. About one-third of Beijing’s winter vegetables are grown in greenhouses (I’m unclear if that’s one third of all their vegetables, or one third of warm weather crops.)
Dan has logged winter indoor and outdoor temperatures at his home-built modified Chinese greenhouse in Missouri, and found an indoor minimum of 48°F (9°C) with outdoor temperatures of -10°F (-23°C) for the first two winters. One feature of this book that especially appeals to me is that Dan describes the pros and cons of multiple options for achieving various goals – thermal mass, insulation, glazing, trusses – no need for expensive mistakes!
To build your Chinese greenhouse, you first need to choose a site, excavate it and take steps to prevent water leaking into your greenhouse. Yes, you really do need to earth-shelter your Chinese greenhouse, unless you are in the southern tier of the United States. While you are planning your excavation, consider the options of geo-thermal heating/cooling tubes, or tubing to take excess hot air from the greenhouse and store it in the earth berm until winter.
Check the slope of your land and draw a scale plan to make sure it will work. The perfect slope is 20° south, but anywhere between 10° and 30° will work. It partly depends on the height you want inside. You can also import soil if you need more than your excavation will provide. Stake out the site, using a compass to get the best orientation, correcting for magnetic declination (it’s all in the book). Ensure you are not excavating in a natural drainage path – observe the path of heavy rainfall or snowmelt. Look for subsurface springs or seeps. Look for wet areas in spring. You don’t want to have to incorporate a “water feature†in your new greenhouse! Perhaps consult a water engineer or locally experienced excavator. If necessary, construct swales uphill from your site, to divert water away from your greenhouse. Details of these and various drainage possibilities are in the book.
Dan recommends renting a skid steer loader with tracks rather than tires, or a small excavator. Keep the topsoil and subsoil separate, and covered if it might rain before you finish. Get seed on hand to sow on the berm as soon as possible after creating it, and/or transplant native ground cover plants.
If you really can’t do earth-sheltering, you can compensate to some extent in an above-ground greenhouse by adding lots of thermal mass in the floors and walls. I have some mixed feelings about the use of interior thermal mass. In the 1970’s there were greenhouse books advocating so many barrels of water to store heat, that there was little space left to grow plants!
After completing the excavation you can start incorporating heat-absorbing dark colored thermal mass in the floor and back wall, up to the optimal 4†(10 cm) thick, to store heat gained during sunny days. Dan discusses several possible materials: poured concrete, bricks, flagstones, soil-cement, cement blocks, bin blocks, adobe, cob and rammed earth. How’s that for a thorough review of options? Beware earthen materials that can disintegrate in a damp environment (you can’t use them underground). An adobe, stone or blockwork north wall works. Be aware of all the ecological plusses and minuses of concrete. Bin blocks are large concrete blocks made by concrete contractors when emptying out returning concrete mixers. The price is good! Paying for transportation is expensive! The smallest ones weigh half a ton, so you’ll need at least a tractor with a bucket, if not a crane, to stack them.
If this sounds like a lot of work and you start thinking about installing a wood stove instead, Dan invites you to think again: wood heat is “the black sheep of the renewable energy field.†Burning wood produces carbon dioxide, contributing to global warming. It also produces toxins such as sulfur and nitrogen oxide gases, which form acid rain. And particulates that irritate lungs.
The next group of decisions is about wall framing and glazing. Will your framework be curved or in flat planes? Only some kinds of glazing curve, so figure these two items out together. Soil is not a good insulator, as many people wrongly assume. The water in the soil conducts heat, so it is important to insulate the north wall, north roof, and the east and west ends.  You’ll need deep walls with space for R-40 to R-50 insulation. Dan discusses options: loose-fill cellulose and fiberglass; batts of fiberglass, rock wool and cotton; rigid foam sheets of polystyrene, polyisocyanurate, and mineral wool board; liquid foams like Icynene and Air Krete. He recommends loose-fill cellulose, which is made from old newspapers.
Framework options include traditional lumber, home-made or purchased laminated wood rafters (straight or arched), steel tubing (round or square), or metal trusses. There are photos and tips for each of these. Be sure to consult a structural engineer or architect to ensure your roof will support the snow and wind loading that you might experience in your location. While tubing is adequate for smaller greenhouses, steel trusses are stronger and advised for wider greenhouses.
If you are using standard lumber and vertical walls, you will need to carefully determine the roof angle giving the best light transmission without too much summer heat gain. Light hitting the glazing at small angles will reflect rather than pass through. The rule of thumb is to add 20° to your latitude to get the ideal roof angle for maximum winter sun transmission. I found this particular sidebar confusing, but happily, I don’t need to know right now. Dan recommends a lower sloped roof than the calculation suggests, perhaps 30°.
Options for glazing include glass, ETFE, rigid polycarbonate, poly reinforced polyethylene sheeting, and polyethylene film. Light transmission ranges from 75-95%, but light transmission is not all we care about. Plants can do better with light diffused through translucent materials, bouncing around at all angles rather than beaming straight in. Glass is fragile and expensive.
The price of the plastics starts with a high for ETFE (ethylene tetrafluoroethylene), For most of us, this is outside the budget: $9,000 for a 20 ft (6 m) greenhouse. Sell 7,000 bags of lettuce to pay for it! Double-wall acrylic is another very pricey option, with very pricey shipping costs. Solawrap looks like bubble-wrap on steroids, provides some insulation (R-1.7) It is sold in rolls the width of the gap between bows (or rafters). A roll 4’ x 328’ (1.2 x 100 m) costs about $2,200 plus shipping. Polycarbonate has channels of air providing some insulation. The price is lower than Solawrap, but the special hardware adds to the cost. Poly reinforced polyethylene (PRP) resembles rip-stop fabric used for outdoor gear, with a reinforcing mesh embedded in it. It comes with a ten-year UV warranty. Avoid wearing holes in your PRP by fitting it snugly after duct-taping any hardware that will contact the sheeting. The price is one-tenth that of Solawrap (but it provides no insulation). Standard 6 mil greenhouse poly is much cheaper, and using two layers with an inflated air space provides some insulation. You’ll need to replace the plastic every 5-7 years.
To reduce heat losses through the glazing at night, install a blanket. White shadecloth resting on plastic-coated cables or laundry line works well. Aluminet and Tempa Interior Climate Screen work even better as heat reflectors, keeping heat out in summer, in during the winter. Radiant heat barriers can be used on the inside surfaces of roofs and walls to reflect heat back. One kind is a shiny aluminized sheet with a scrim backing, another kind is reflective bubble wrap.
The next part of the book explains ways to improve on the performance of Chinese greenhouses, to consider before you start. Use the excess heat on sunny winter days to mitigate the cold night temperature. Hot air from the top of the greenhouse can be pumped into porous pipes running through an in-floor storage medium such as a bed of gravel. You can wire thermostatically-controlled low-wattage DC fans directly to 50-watt photovoltaic modules, without batteries. When the sun shines, the fans operate. Having air movement in a greenhouse is helpful in managing fungal diseases and bugs, even when it isn’t banking heat. And bringing hot damp air through a gravel bed allows condensation to form in the gravel bed, effectively reducing the humidity of the air above.
Seasonal heat banking is designed to store excess heat from the summer to use in the winter. The usual method is to construct a large heat exchanger, composed of lots of plastic pipe deep underneath the greenhouse. Underground heat at 7 m (23 ft) deep moves through the soil by conduction at a rate of 1 m (3.3 feet) per month. Another method (without pipework) is to install a skirt of rigid board insulation just underground, all around the building to 20 feet (6 m) out. This catches the heat escaping from the building as well as that coming up from deeper in the earth.
I’m going to slide right over the details of designing and building heat bank systems. They involve pumps capable of providing five air changes per hour, thermostats, fans, piping sufficient to allow an airflow rate of 5 feet (1.5 m) per second – that’s 3 mph! Before installing any expensive heat banking and recovery systems, talk with people already using such a system. Once you have literally sunk a lot of money underground, it is very expensive to change. “If you get it right, you should be able to create a structure whose internal temperature in the winter is a heart-warming 35-40 F higher than ambient temperatures.†And pleasant summers too.
Next we have a chapter on minimizing summertime heat gain. One aspect is the roof angle, which we already looked at. A design that works at one latitude won’t be as good at a location with different sun angles. You can shade, vent and (if not in a humid climate) mist, in order to cool the space. That should provide for an extended period of summer use, if not the whole of the summer. Your cooling efforts might need to be moderated by your bug-excluding efforts. You could build a pond (10-15 feet (3-5 m) deep) with cooling loops of pipe. That’s one improvement you can add after construction, adding a fan to spread the cooled air inside.
Next there is info about supplementing the lighting with LEDs, for cloudy areas, or if you are growing commercially. There are explanations about different wavelengths of light, which ones plants use, and in what proportions (65% red, 15% blue, 20% green), and about total PAR, photosynthetically active radiation, the proportion reaching your plants, and the varying PAR requirement at different stages of plant growth. Another consideration is the total amount of light the plants receive each day (the daily light integral).
The final chapter of the book is Dan’s illustrated description of building his Chinese greenhouse in Missouri. His goals are to be cost-effective and environmentally friendly. For simplicity, Dan chose a lumber vertical south wall and sloped (not arched) roof, a departure from the usual curved Chinese greenhouse look. It appears to be about 21 ft long and 30 ft wide/deep. He used 3ft x 16ft (1 m x 5 m) polycarbonate roofing sheets, with plastic H-profile connector strips.
Dan does not gloss over the problems he and his band of helpers met during the 2-3 years spent building his greenhouse. His site was only slightly sloped, so he needed to dig down till he hit bedrock at 6 ft (2 m), then build up and import topsoil to complete the berm. His greenhouse uses rammed earth-filled tires (two summers of work). This is a labor-intensive method, physically draining. Think twice. You’ll need sturdy friends to help you. Even Dan says he would make a different choice if he had it to do over.
There are photos of the gravel footings, the underground pipework, the thermal mass north side and end walls and their insulation, concrete foundations, the Herculean rammed earth tire walls, earth cooling tubes, L-bolts to anchor the tire walls to the sill plate for the glazing, waterproof membranes for the walls that will be in the ground, framing, roofing, and glazing. Keep the chickens from pecking your cob infill, the new berm, suitable groundcover plants, and foam insulation board! Finally a photo of the first plateful of spinach!
Dan ends the book with two of his newest ideas – wind scoops and a methane digester. Of course, all these engineering tweaks won’t help if you’re not a good plantsperson to start with, so you might brush up those skills too, with a different book.
Remember, these are the pioneering days for Chinese greenhouse builders and growers. Not everything has been figured out, especially for locations very different from China or Missouri. You can’t buy exactly what you need “off the shelfâ€. You have to figure out some things for yourself. Some ideas in this book are untested. Don’t take anyone else’s ideas as the perfect solution, This book would have benefited from a bit tighter editing to remove a few slipups. Growing warm weather crops in winter, without fossil fuels, in countries outside sub-tropical zones is a goal worth working for.

Buy this book from Stone Soup Books and 1/2 of the net profits from the purchase goes directly to support VABF!
http://www.stonesoupbooks.net/product-page/chinese-greenhouse


